While driving my Toyota MR-S today, the SMT light popped on and continued to glare at me as I drove. No buzzer or issues shifting, which is odd for the SMT which usually has a melt down when there is something wrong. I made the trip home and plugged in the Techstream cable, a P0703 error displayed (Torque converter or brake switch).
If you’re an owner of an MR-S, you will likely have heard of the the brake lights getting stuck on (even when you turn the car off, so people end up with a flat battery randomly), this is caused by a little plastic grommet crumbling on the brake pedal and allowing the brake switch to remain on. This appears to annoy the SMT since it thinks you’re driving down the road with your foot on the brake. There are a bunch of forum posts about this and how to fix it, but all the ones I saw had pictures lacking detail or real instructions. So here is my guide.
What you will need!
– 14mm spanner / ratchet / socket
– small pointy nose pliers
– A M6x16 Countersunk bolt and 2x matching nuts or the genuine replacement part (90541-06036)
– a spanner that matches the 2x nuts for the M6 bolt (should be an 10mm)
– a phone light or torch you can use to see.
Step 1
Use the 14mm spanner / ratchet / socket to remove the drivers seat, you’re gonna need the space to lay upside down in the foot well unless you are a professional contortionist. (No picture sorry). Two bolts at the front of the seat, two at the rear.
Step 2
Remove the brake pedal spring, unclip it from the pin end and let it dangle from the welded tab. This can easily be done with your hands.
Step 3
Remove the retaining clip from the pin using the pointy nose pliers.

Step 4
Push the pin out of the pedal by hand, there should be little effort to do this.

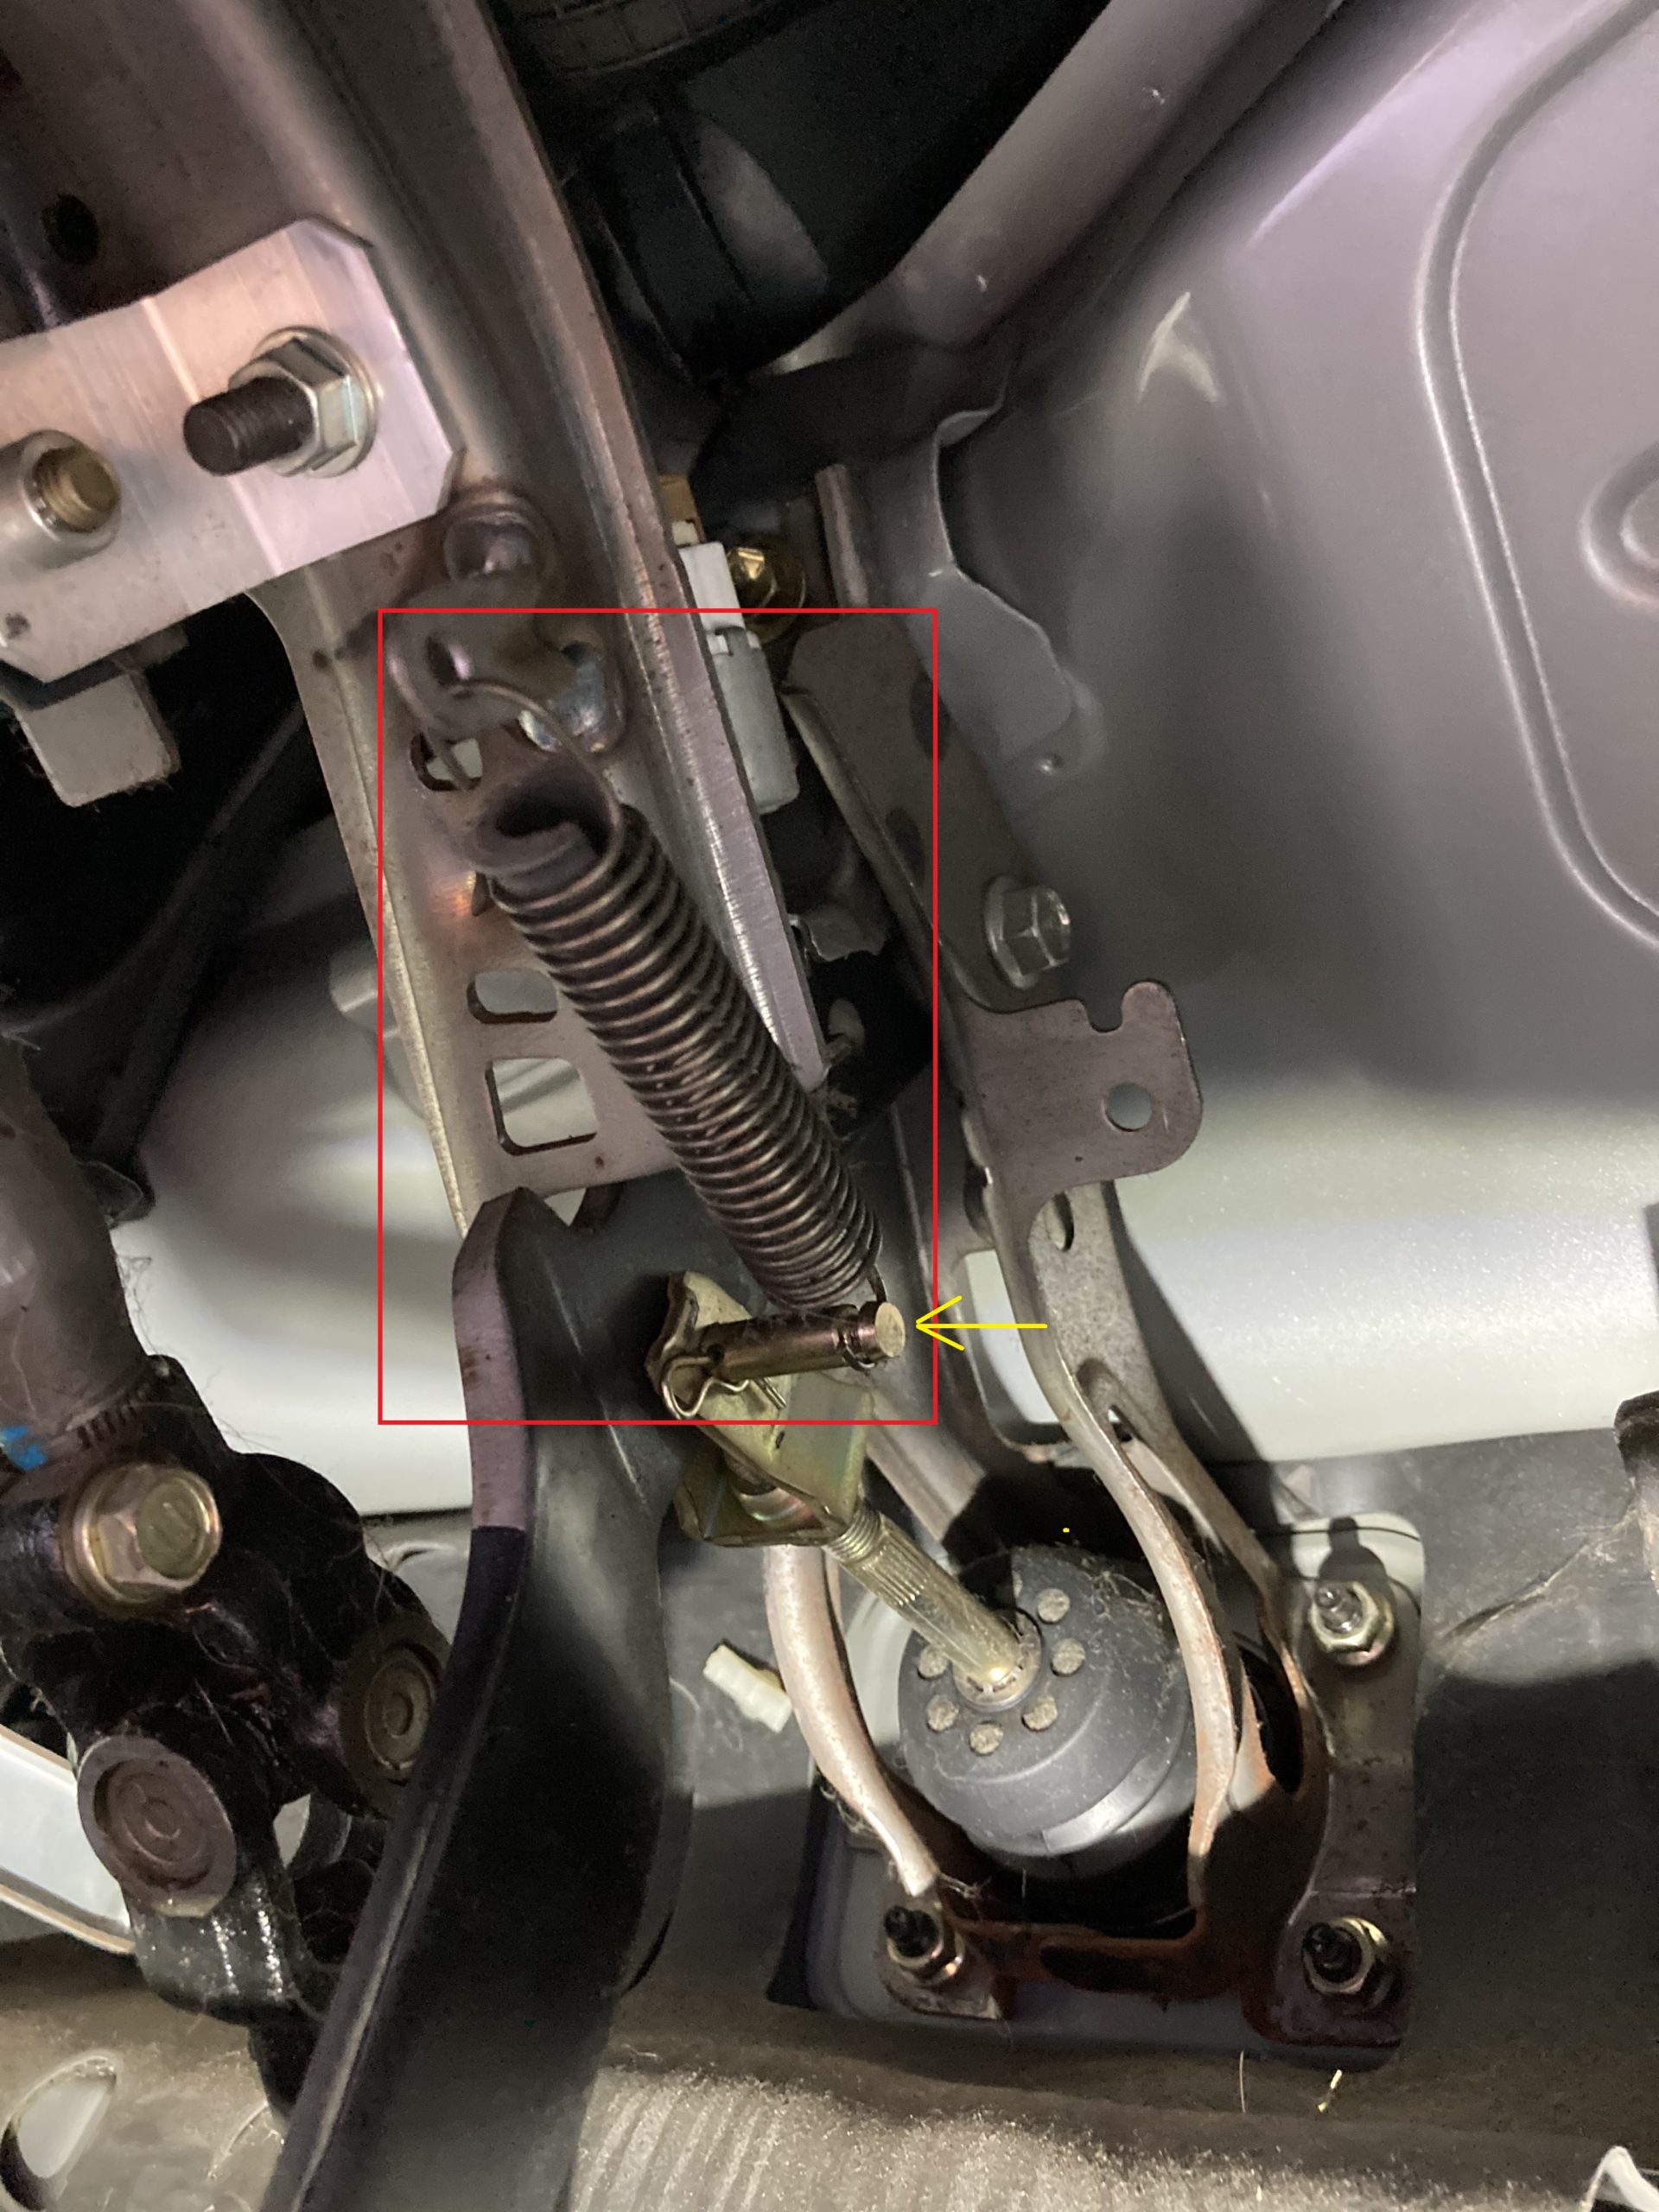
Step 5
With the pin out, the pedal can now float and it gives you around 10-15mm of space to move before it presses against the brake master. You can easily push the Toyota part in now or if you are doing the bolt method, pushing the pedal against the master will yield enough space to get the M6 countersunk bolt in (As seen in the small red box)

Step 6
If you’ve put the Toyota part in, go to step 7. If you’re using the bolt. You cannot get an Allen key into the bolt to tighten, so grab the head with the pointy nose pliers and thread the first nut on and tighten. Put the pilers onto the first nut and wind the second nut on and tighten.

Step 7
Reassemble everything!
Put the pin back in, put the clip in the pin, put the spring back onto the pin.

Step 8.
Refit your seat!
Enjoy having you brake lights turning off when they should.